Samba — программа, которая позволяет сделать из Linux/Unix компьютера файловый сервер для Windows машин. Если вы хотите со своего компьютера под Windows получить доступ к файлам на сервере под ubuntu, то на сервер надо ставить Samba. Также, начиная с 4ой версии, Samba позволяет полностью заменить контроллер домена Active Directory.
В Ubuntu Samba ставится командой
sudo aptitude install samba
После установки сервер надо настроить, конфигурационный файл находится в /etc/samba/smb.conf
Сам конфигурационный файл разбит на блоки. В принципе всё там понятно, да и комментарии написаны подробно и ясно. Поподробнее остановлюсь на некоторых настройках. Например строчка
security = user
Делает так, что для того чтобы залогинится на сервере samba обязательно нужно использовать учётную запись сомой Ubuntu, то есть для того чтобы создать samba-юзера надо сделать следующее:
Сначала создать пользователя в Ubuntu
sudo adduser <username>
а потом создать samba-пользователя
sudo smbpasswd -a <username>
Открыть доступ на какую-нибудь папку очень просто. Допустим, мы хоти сделать три доступных каталога:usershare – доступный только определённым пользователям, download – откуда можно только скачивать файлы и upload – папка для закачки файлов на сервер. Для начала создадим три директории/home/share/usershare, /home/share/download и /home/share/upload, сделать каталог upload доступным для записи
sudo chmod 777 /home/share/upload
и запишем в конец конфигурационного файла /etc/samba/smb.conf следующий текст.
[usershare]
comment = User share
path = /home/shares/usershare
valid users = username
create mask = 0660
directory mask = 0771
writable = yes

[download]
comment = All users download
path = /home/share/download
create mode = 0700
directory mask = 0700
available = yes
browsable = yes
public = yes
writable = no

[upload]
comment = All users upload
path = /home/share/upload
create mode = 0777
directory mask = 0777
available = yes
browsable = yes
public = yes
writable = yes
Не забудьте перезапустить samba после изменения конфиг. файла.
sudo /etc/init.d/samba restart
Так же для ленивых имеется графический интерфейс для настройки samba, только он не много умеет. Установить GUI для samba можно командой
sudo apt-get install system-config-samba
Устанавливать его надо на комп с самбой и соответственно запускается он только с него же, поэтому ни о каком удалённом управлении через него речи не идёт, но управлять своей домашней шарой очень удобен. Запускается он командой
sudo system-config-samba

Все изменения он записывает в конфигурационный файл samba.
If you are either a power home user or you are in a business environment, you know the importance of machines being able to see one another. Recently I did an article about this very topic («Sharing Files & Folders Between Linux, Mac, and Windows«) which skimmed this topic, showing how simple it is to allow these different operating systems to see one another — with the help of Samba. But that article didn’t dig too deeply into Samba itself. That article was more of a «let’s see how we can do this quickly and easily» tutorial.
This time around I’ll focus more on Samba and how it is installed and configured to allow for the sharing of files and folders. For this article, we will look at the smb.conf configuration file and how it is set up and how to create new shares and even share printers. You will be using a text editor and a few commands. So get your fingers ready to type.
Installation
Installing Samba is really quite simple. Since we are going to be dealing with the command line, let’s install Samba in the same way. So open up your favorite terminal window and prepare to install.
All of the installation commands will be issued as either the root use or by using the sudo command Whether you use su or sudo will depend upon which distribution you are using. If you are using Fedora (or a Fedora-like distribution), you will su to the root user. If you are using Ubuntu (or a Ubuntu-like distribution), you will use sudo.
Within the terminal window, issue the command sudo apt-get install samba smbfs. If you are using Fedora that command would be yum install samba smbfs. Once Samba is installed, it is time to start configuring.
Configuration
There is only one file you need concern yourself with — /etc/samba/smb.conf. Out of the box, this file might be rather daunting. I always like to start from scratch, so I do the following (from command line):
- sudo mv /etc/samba/smb.conf /etc/samba/smb.conf.bak
- sudo rm /etc/samba/smb.conf
- sudo touch /etc/samba/smb.conf
The above simply makes a backup of the smb.conf file, removes the original, and then creates a new, empty smb.conf file.
Before we actually begin creating our smb.conf file, let’s take a look at how this file is structured. Thesmb.conf file is broken down in to sections, with each section beginning with [NAME] (Where NAME is the name of the section). Typical sections are:
- [global] — This is the section that contains configuration options used in all sections.
- [share] — This section will define a share name.
- [printers] — This section will define a shared printer.
Within each section will be directives that define various aspects of a configuration. Let’s take a look at a minimal (but useful) smb.conf file.
[global]
netbios name = NETBIOS_NAME
workgroup = WORKGROUP
security = user
encrypt passwords = yes
smb passwd file = /etc/samba/smbpasswd
interfaces = 192.168.1.1/8
[SHARE_NAME]
comment = COMMENT
path = /PATH/TO/SHARE
writeable = yes
create mask = 0770
force create mode = 0770
locking = yes
[printers]
comment = COMMENT
path = /var/spool/samba
guest ok = Yes
printable = Yes
use client driver = Yes
browseable = No
NOTE: Everything in bold is system specific.
There are a few things we must touch on with the above configuration. Let’s go line-by-line as needed (many of the lines should be self-explanatory).
security = user: This line defines the method of authentication Samba will use. I have always found user to be the most reliable. Samba has five different methods:
- user: Each user will have an account on the machine hosting Samba.
- server: This mode is not used anymore — it defines an external authentication server.
- ADS: Active Directory mode.
- Domain: This type is a centrally located account which is shared between domain controllers.
- share: Clients will authenticate against a particular share on the Samba server.
interfaces = 192.168.1.1/8: This line will dictate the addresses that are allowed to connect to your shares. This will be specified by your network topology.
create mask = 0770/force create mode = 0770: These lines dictate the permissions given to anything created, by users, within the share. In this case the clients will get read/write access to all files except those belonging to «other.» Without these lines, clients will have trouble creating files/folders in the share.
locking = yes: This is critical when sharing folders as it will create a lock file for any open file. When a file has an associated lock file other users can not open that file for writing. This prevents users from overwriting changes at the same time, causing file corruption.
use client driver = Yes: This line dictates that Samba is not required to share out drivers for clients. If you are on a larger network then you might want to share out drivers. Otherwise the drivers for the shared printer will have to be installed on the client machines.
Once you have that file created, save it and then restart Samba (with a command like sudo /etc/init.d/samba restart). Of course you’re not done yet.
Adding Users
If you do not add users to your Samba installation, those users will not be able to authenticate, which will keep them from browing/using the shares. In order to add a user you have to issue two commands:
sudo smbpasswd -L -a USERNAME
and
sudo smbpasswd -L -e USERNAME
Where USERNAME is the actual username on the system.
The first command will add the user and a password for the user (you will be prompted to enter the new user password after you enter the command). The second command enables the user for Samba.
Now your users are ready to authenticate and use Samba. You can go back to the original article I mentioned (at the beginning of this tutorial) to see how to connect to the server from both Mac and Windows.
Printers
A note about printers. In some instances Samba will not add the /var/spool/samba directory that is used for printer spooling. Check to see if this exists with the command ls /var/spool/. If you see samba there, you are good to go. If not, issue the following commands:
sudo mkdir /var/spool/samba
sudo chmod 777 /var/spool/samba
That should do it. Make sure the printer you wish to share actually works on the local Linux machine and it should be shared out and ready to go for your clients.
Содержание
Setting up a Samba file share is the easiest method for connecting a media server to a variety of computers of differing operating systems. It also provides easy access to the server for adding and removing files; especially for those not familiar with the command line environment.
This tutorial assumes that you have basic knowledge of the command line environment and have a Ubuntu server already running with SSH installed.
Message of Caution
Before we get started I have a message of caution for when setting up any new type of server. Always, always, always back up configuration files before you edit them. Trust me. I learnt this the hard way on a different server which resulted in a few fresh installs. This is even more important on a SheevaPlug as fresh installs are not as straight forward as a regular server.
So before editing any configuration file, make sure you type
cp configurationfile.extension configurationfile.extension.backup
Obviously replace the word configurationfile with the name of your file and use the proper extension. By adding .backup, or any other bogus extension, to the end of the file, you will preserve it in it’s original state. If you mess up the original configuration file, just copy the backup to the same name as it originally was. By taking this precaution when editing config files, I guarantee that you will save yourself some serious pains down the line.
Installing and setting up Samba is very easy. First start by installing from the repository with
apt-get install samba
Configuration
Now we’re going to set up the Samba config file. Make sure you backup the file as per the instructions above before you make any edits. Open the file for editing with
vi /etc/samba/smb.conf
Find the section Authentication section of the file. It will appear as so
####### Authentication #######
# «security = user» is always a good idea. This will require a Unix account
# in this server for every user accessing the server. See
# /usr/share/doc/samba-doc/htmldocs/Samba3-HOWTO/ServerType.html
# in the samba-doc package for details.
# security = user
Uncomment the line
security = user
and add a line right after it so the final authentication section appears as so
# «security = user» is always a good idea. This will require a Unix account
# in this server for every user accessing the server. See
# /usr/share/doc/samba-doc/htmldocs/Samba3-HOWTO/ServerType.html
# in the samba-doc package for details.
security = user
username map = /etc/samba/smbusers
Now of course you will want to share a specific folder with the users in your house. We are going to share the external hard drive we have attached at /media/external.
Once again open up the smb.conf file for editing and find the «Share Definitions» section and add the text below.
#external media drive
[server]
comment = External Media Drive
browseable = yes
writeable = yes
path = /media/external
guest ok = yes
When you connect to the Samba share, you should have one option to select and that is «server». If you want to add more specific shares, duplicate the code above with your desired settings making sure that the name in the square brackets, currently «server», is different than the others. If you have more than one share set up, you will see the list of them upon connection.
Creating A Samba User
You can only create a samba user for a user that already exists on the system so make sure you’ve already done that before trying the next step.
This server is useless without users so lets add a user to Samba with the line
smbpasswd -a username
It will prompt you for a password and then a confirmation. Once completed, you now have a samba user.
Now that your Samba file share is all set up you can try connecting from your computer. For Mac OSX users, in Finder, go to the menu «Go» and select «Connect to Server» and type
smb://192.168.1.200
You will then be prompted for a username and password. Enter the proper credentials and select the share to connect to from the list provided. For our setup only «server» will be listed». After you connect, the file share will appear as a folder on your computer. From there you can stream media, add media and organize files from the comfort of your GUI desktop.
Samba-3: A Simple Anonymous Read-Write Server
Charity Administration Office
The fictitious charity organization is calledAbmas Vision NL. This is an office that has five networked computers. Staff are all volunteers with frequent staff changes. Ms. Amy May, the director of operations, wants a no-hassle network. Anyone should be able to use any PC. Only two Windows applications are used: a custom funds tracking and management package that stores all files on the central server and Microsoft Word. The office prepares mail-out letters, letters of invitation, and thank-you notes. All files must be stored in perpetuity. The custom funds tracking and management software has been configured to use a server named SERVER, a share named FTMFILES, and a printer queue named PRINTQ that uses preprinted stationery, thus demanding a dedicated printer. This printer does not need to be mapped to a local printer on the workstations.
Printer handling in Samba results in a significant level of confusion. Samba presents to the MS Windows client only a print queue. The Samba smbd process passes a print job sent to it from the Windows client to the native UNIX printing system. The native UNIX printing system (spooler) places the job in a print queue from which it is delivered to the printer. In this article, network diagrams refer to a printer by the name of the print queue that services that printer. It does not matter what the fully qualified name (or the host name) of a network attached printer is. The UNIX print spooler is configured to correctly deliver all jobs to the printer.
This organization has a policy forbidding use of privately owned computers on site as a measure to prevent leakage of confidential information. Only the five PCs owned by Abmas Vision NL are used on this network.
The central server was donated by a local computer store. It is a dual processor Pentium-III server, has 1GB RAM, a 3-Ware IDE RAID Controller that has 4 x 200GB IDE hard drives, and a 100-base-T network card. The office has 100-base-T permanent network connections that go to a central hub and all equipment is new. The five network computers all are equipped with Microsoft Windows Me. Funding is limited, so the server has no operating system on it. You have approval to install Samba on Linux, but just make sure it works without problems. There are two HP LaserJet 5 PS printers that are network connected. The second printer is to be used for general office and letter printing. Your recommendation to allow only the Linux server to print directly to the printers was accepted. You have supplied SUSE Enterprise Linux Server version 8.0 and have upgraded Samba to version 3.0.2.
Dissection and Discussion
This installation demands simplicity. Frequent turn-over of volunteer staff would indicate that a network environment that requires users to logon might be problematic. It is suggested that the best solution for this office would be one where the user can log onto any PC with any username and password. Samba can accommodate an office like this by using the force user parameter in share and printer definitions. The use of the force user ensures that all files are owned by same user identifier (UID) and thus ensures that there will never be a problem with file access due to file access permissions. Additionally, you elect to use the nt acl support = No option to ensure that no attempts can be made to write access control lists (Posix type) to any file or directory. This prevents an inadvertent ACL from overriding actual file permissions.
This organization is a prime candidate for Share Mode security. The force user allows all files to be owned by the same user and group. In addition to this, it would not hurt to set SUID and set SGID shared directories. This means that all new files that are created, no matter who creates it, are owned by the owner or group of the directory in which they are created. For further information regarding the significance of the SUID/SGID settings, see Appendix A.6 (not available here – see Samba-3 by Example book).
All client workstations print to a print queue on the server. This ensures that print jobs continue to print in the event that a user may shut down the workstation immediately after sending a job to the printer. Today, both Red Hat Linux and SUSE Linux use CUPS-based printing. Older Linux systems offered a choice to use either the LPRng printing system, or CUPS. It appears, however, that CUPS has now become the leading UNIX printing technology.
The print queues are set up as Raw devices, which means that CUPS will not do intelligent print processing, and vendor supplied drivers be installed locally on the Windows clients.
The hypothetical software (Funds Tracking and Management) referred to is representative of custom-built software that directly uses a NetBIOS interface. Most such software originated in the days of MS/PC DOS. NetBIOS names are upper-case (and functionally are case insensitive), thus some old software applications would permit only upper-case names to be entered. Some such applications were later ported to MS Windows but retain the upper-case network resource naming conventions because customers are familiar with that. We made the decision to name shares and print queues for this application in upper-case also for the same reason. Nothing would break if you were to use lower-case names, but that decision might create a need to re-educate staff — something best avoided at this time.
NetBIOS networking does not print directly to a printer. Instead, all printing is done to a print queue. The print spooling system is responsible for communicating with the physical printer. In this example, therefore, the resource that is referred to as PRINTQ really is just a print queue. The name of the print queue is held to be representative of the device to which the print spooler delivers print jobs.
Implementation
It is assumed that the server is fully installed and ready for configuration of Samba 3.0.2 and for necessary support files. All TCP/IP addresses should be hard coded. In our case, the IP address of the Samba server is 192.168.1.1 and the netmask is 255.255.255.0. The host name of the server used was server. The office network is built as shown in Figure 2.1.
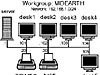 FIGURE 2.1 Charity Administration Office Network
Procedure 2.4. Samba Server Configuration
- Create a group account for office file storage as follows:
root# groupadd office
- Create a user account for office file storage as follows:
root#  useradd -m abmas
root#  passwd abmas
Changing password for abmas.
New password: XXXXXXXX
Re-enter new password: XXXXXXXX
Password changed
where XXXXXXXX is a secret password.
- Use the 3-Ware IDE RAID Controller firmware utilities to configure the four 200GB drives as a single RAID level 5 drive, with one drive set aside as the hot spare. (Refer to the 3-Ware RAID Controller Manual for the manufacturers’ preferred procedure.) The resulting drive has a capacity of approximately 500GB of usable space.
- Create a mount point for the file system that can be used to store all data files. Create a directory called /data as follows:
root#  mkdir /data
root#  chmod 755 /data
The 755 permissions on this directory (mount point) permit the owner to read, write and execute, and the group and everyone else to read and execute only.
- Use SUSE Linux system tools (refer to the SUSE Administrators Guide for correct procedures) to format the partition with a suitable file system. The reiserfs file system is suitable. Configure this drive to automount using the /data directory as the mount point. It must be mounted before proceeding.
- Under the directory called /data create two directories named ftmfiles and officefiles, and set ownership and permissions as follows:
root#  mkdir -p /data/{ftmfiles,officefiles/{letters,invitations,misc}}
root#  chown -R abmas.office /data
root#  chmod -R ug+rwxs,o-w,o+rx /data
These demonstrate compound operations. The mkdir command creates in one step these directories:
/data/fmtfiles
/data/officefiles
/data/officefiles/letters
/data/officefiles/invitations
/data/officefiles/misc
The chown operation sets the owner to the user abmas and the group to office on all directories just created. And the chmod operation recursively sets the permissions so that the owner and group have SUID/SGID with read/write/execute permission, and everyone else has read and execute permission. This means that all files and directories are created with the same owner and group as the directory in which they are created. Any new directories created still have the same owner, group, and permissions as the directory they are in. This should eliminate all permissions-based file access problems. For more information on this subject, refer toTOSHARG, Chapter 13, File, Directory and Share Access Controls, or refer to the UNIX man page for the chmod and the chown commands.
- Install the smb.conf file shown in Example 2.2. in the /etc/samba directory.
- We must ensure that the smbd can resolve the name of the Samba server to its IP address. Verify that the /etc/hosts file contains the following entry:
192.168.1.1 server
- Configure the printers with the IP address as shown in Figure 2.1. Follow the instructions in the manufacturers’ manual to permit printing to port 9100, so that the CUPS spooler can print using raw mode protocols.
- Configure the CUPS Print Queues as follows:
root#  lpadmin -p PRINTQ -v socket://192.168.1.20:9100 -E
root#  lpadmin -p hplj5 -v socket://192.168.1.30:9100 -E
This creates the necessary print queues with no assigned print filter.
- Edit the file /etc/cups/mime.convs to uncomment the line:
application/octet-stream application/vnd.cups-raw 0 -
- Edit the file /etc/cups/mime.types to uncomment the line:
application/octet-stream
- Use the standard system tool to start Samba and CUPS to configure them to restart automatically at every system reboot. For example:
root#  chkconfig smb on
root#  chkconfig cups on
root#  /etc/rc.d/init.d/smb restart
root#  /etc/rc.d/init.d/cups restart
Example 2.2. Charity Administration Office smb.conf File
Procedure 2.5. Windows Client Configuration
- Configure clients to the network settings shown in Figure 2.1.
- Ensure that the netmask used on the Windows clients matches that used for the Samba server. All clients must have the same netmask. For example, 255.255.255.0.
- On all Windows clients, set the WINS Server address to 192.168.1.1, the IP address of the server.
- Set the workgroup name on all clients to MIDEARTH.
- Install the “Client for Microsoft Networks.” Ensure that the only option enabled in its properties is the option “Logon and restore network connections.”
- Click OK when you are prompted to reboot the system. Reboot the system, then logon using any user name and password you choose.
- Verify on each client that the machine called SERVER is visible in My Network Places, that it is possible to connect to it and see the share office, and that it is possible to open that share to reveal its contents.
- Disable password caching on all Windows 9x/Me machines using the registry change file shown in Example 2.3. Be sure to remove all files that have the PWL extension that are in theC:\WINDOWS directory.
Example 2.3. Windows Me Registry Edit File: Disable Password Caching
REGEDIT4

[HKEY_LOCAL_MACHINE\SOFTWARE\Microsoft        Windows\CurrrentVersion\Policies\Network]
        "DisablePwdCaching"=dword:00000001
The best way to apply this is to save the patch in a file called ME-dpwc.reg and then execute:
C:\WINDOWS: regedit ME-dpwc.reg
- Instruct all users to log onto the workstation using a name of their own choosing, with a password of their own choosing. The Samba server has been configured to ignore the username and password given.
- On each Windows Me workstation, configure a network drive mapping to drive G: that redirects to the uniform naming convention (UNC) resource \\server\officefiles. Make this a permanent drive connection as follows:
- (Right-click) My Network->Map Network Drive…
- In the box labeled “Drive:”, type G.
- In the box labeled “Path:”, enter \\server\officefiles.
- Click Reconnect at logon. Click OK.
- On each workstation, install the Funds Tracking and Management software following the manufacturer’s instructions.
- During installation, you are prompted for the name of the Windows 98 server. Enter the name SERVER.
- You are prompted for the name of the data share. The prompt defaults to FTMFILES. Press enter to accept the default value.
- You are now prompted for the print queue name. The default prompt is the name of the server you entered (SERVER as follows: \\SERVER\PRINTQ). Simply accept the default and press enter to continue. The software now completes the installation.
- Install an office automation software package of the customer’s choice. Either Microsoft Office 2003 Standard or OpenOffice 1.1.0 suffices for any functions the office may need to perform. Repeat this on each workstation.
- Install a printer on each using the following steps:
- Click Start->Settings->Printers+Add Printer+Next. Do not click Network printer. Ensure that Local printer is selected.
- Click Next. In the panel labeled Manufacturer:, select HP. In the Printers: panel, select the printer called HP LaserJet 5/5M Postscript. Click Next.
- In the panel labeled Available ports:, select FILE:. Accept the default printer name by clicking Next. When asked, “Would you like to print a test page?”, click No. Click Finish.
- You may be prompted for the name of a file to print to. If so, close the dialog panel. Right-click HP LaserJet 5/5M Postscript->Properties.
- In the panel labeled Network, enter the name of the print queue on the Samba server as follows: \\SERVER\hplj5. Click OK+OK to complete the installation.
- It is a good idea to test the functionality of the complete installation before handing the newly configured network over to the Charity Administration Office for production use.
Validation
The first priority in validating the new Samba configuration should be to check that Samba answers on the loop-back interface. Then it is time to check that Samba answers its own name correctly. Last, check that a client can connect to the Samba server.
- To check the ability to access the smbd daemon services, execute the following:
root#  smbclient -L localhost -U%
        Sharename     Type     Comment
        ---------     ----     -------
        FMTFILES      Disk
        Office        Disk
        IPC$          IPC      IPC Service (Samba 3.0.2)
        ADMIN$        IPC      IPC Service (Samba 3.0.2)
        PRINTQ        Printer  PRINTQ
        hplj5         Printer  hplj5

        Server             Comment
        ---------          -------
        SERVER             Samba 3.0.2

        Workgroup          Master
        ---------          --------
        MIDEARTH           SERVER
This indicates that Samba is able to respond on the loopback interface to a NULL connection. The -U% means send an empty username and an empty password. This command should be repeated after Samba has been running for 15 minutes.
- Now verify that Samba correctly handles being passed a username and password, and that it answers its own name. Execute the following:
root# smbclient -L server -Uroot%password
The output should be identical to the previous response. Samba has been configured to ignore all usernames given; instead it uses the guest account for all connections.
- From the Windows 9x/Me client, launch Windows Explorer, [Desktop: right-click] Network Neighborhood+Explore->[Left Panel] [+] Entire Network->[Left Panel] [+] Server->[Left Panel] [+] Plans. In the right panel you should see the files and directories (folders) that are in the Plans share.
 Русский